Tuesday, November 25, 2008

The Next Mitt


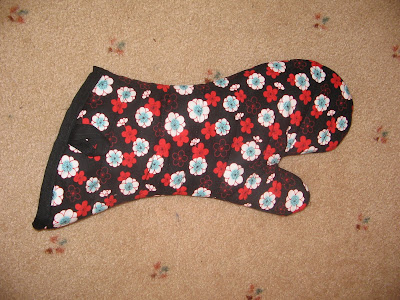
I have made another oven-mitt, this one for my SIL's birthday. I thought it would be a lot quicker than the first one, but alas, due to a couple of silly mistakes, it took me just as long (around 2.5hrs). Firstly, when I was doing the quilting, the fabric on the underside got caught up and I sewed it folded up on itself, and obviously had to unpick. Then when doing the binding, I forgot to add in the hanging loop, and had to unpick. I don't like unpicking!! Oh, and I made my own binding :) It was supposed to be in a red to match the flowers (that I painstakingly picked to make sure it matched exactly) but I didn't dry it in time...

Other than that, I am very happy with this. It is an improvement on the first one. The quilting lines are straighter and evenly spaced, given I took the time to mark them out. I am sad to say that I marked the beginning and end of each line at the edge of the fabric and then used a ruler as a guide while I sewed. A sewing buddy told me a needed I special pen that comes off when you iron. Sounds like a winner to me!

Oh, and I made a matching card :) A subtle way of letting the recipent know that I made the mitt. 

Sunday, November 9, 2008

November Sewing Challenge: Oven Mitt


This was my first attempt at sewing an oven mitt. I used a combination of these patterns/tutorials:

http://www.skiptomylou.org/2008/09/26/oven-mitt-pattern & http://www.allfreecrafts.com/sewing/oven-mitts.shtml

As I'm only new to sewing, I like instructions that are crystal clear. So I often refer to multiple sources when trying a new project. It helps to see how different people explain things. I actually merged the two patterns - I used the top bit (thumb and finger section) of the skiptomylou pattern, and the bottom half of the allfreecrafts one as it was a bit fancier. Now that I've finished, I think it would have been easier to do a straight bottom as this was also my first attempt at bias binding.


These two pics show the bias binding. And my not-so-straight stitching... you can see from the pic on the right that I actually didn't catch the binding on the wrong side for one section. I believe I did the binding correctly, I just should have sewn it a little closer to the edge (as in, move the binding closer to the edge) to allow for the bulk of the mitt. I did have trouble going around the bottom edge, it is all puckered. Not sure what I should have done here? But overall, I have to say that I am quite impressed by my efforts.

Oh, the quilting... it looks pretty good, but I don't think it needed to be so close together. And next time I'll make sure the lines on the two sides are lined up.

No More: November

I'm a little late on posting this. But better late than never. My 'no more' item for this month is paper products. Not all of them! I am just making a start. So, I am no longer going to buy:

TISSUES

This is simple - use hankies instead. Remember those things? I am ashamed to say that I only own a couple, so I will be making some more out of some material I got from Freecycle recently. Until then we will use up the box of tissues that we have. I'm not sure about visitors... I'm thinking I will have a small container of hankies in the bathroom should anyone need a tissue while they are here. And yes, they can keep it, I won't be asking for it back!

WRAPPING PAPER


I received a present in a material draw-string bag from a friend a while ago. I thought this was a great idea. I've been able to reuse the bag for many things. So, when I have some time, I will make a few bags to have on hand, either from material I've already got around the house, or possibly from the remnants bin at Spotlight. They shouldn't take long to whip up, and I love that the wrapping will be a part of the gift. Now, I do have a small stash of wrapping paper in my cupboard. I will give myself till the end of this month to use it if I wish (I find having a changeover period makes me more likely to stick to these "no more" things). If I haven't used it by then, it will be offered up on Freecycle.

PAPER TOWELS

We use paper towels for draining oily foods, mopping up the occasional spills, wiping mushies... I think that's about it. I was thinking about this and thought how lazy it really is. I mean, is it that much harder to grab a cloth wipe, use it, and throw it in the washing basket? I think not! So, I've already been doing this one for a few weeks, since our last roll of paper ran out. I have a plan to get some cute fabric to make up a bunch of cloth "paper towels". They will be so much more fun to use than dodgy paper :)

FWIW, we already use cloth wipes for our baby and cloth nappies, so no paper products there. And we switched to recycled toilet paper last year (though I did treat myself to some of the extra fluffy, soft stuff after I gave birth). I've thought about going to 'family cloth' but I'm not sure about that just yet. I figure there are other eco-friendly steps I can take before that one!